
Disclosure: I received one or more products for free in exchange for an honest review on my blog.
I feel like my blog has been a little bah-humbug, Christmas is just 1 short week away and I haven't had a chance to do much!
It makes my heart happy to finally get my butt in gear and bring you a cratfy Christmas related post!
I was contacted a few weeks ago by a representative of a company called Burlapfabric.com to see if I would like to receive some of their products to review.
(Ok, you HAVE to go check out their website, they have so many types of burlap to choose from!
Light, dark, chevron print, ribbon, bags, colored, banners, you name it!)
I have been wanting to make my own stockings for years.
I never got around to it because I never knew where to start.
When I opened the box from the company and I saw the contents I knew what I wanted to make.
It was like the stars aligned so I could finally check this off of my crating bucket list.
This is the only stocking I have completed so far, it's mine if you can't tell :)
Over the next couple of days I will be whipping some up for my husband and my 2 boys.
I just LOVE how this one turned out, so I had to share it with you!

This is what my eyes beheld when I opened said box :)
Now do you see why I was so happy?!?
I was really nervous and excited because I had never worked with burlap before, but all of this seemed like it was great quality, and it held up really well.

Below you will find step-by-step instructions with a lot of pictures!
Supplies
burlap
fabric (to line the stocking), I used a fat quarter, and it was the perfect size.
scissors
hot glue gun
sewing machine
any decor items you would like to use to jazz up your stocking
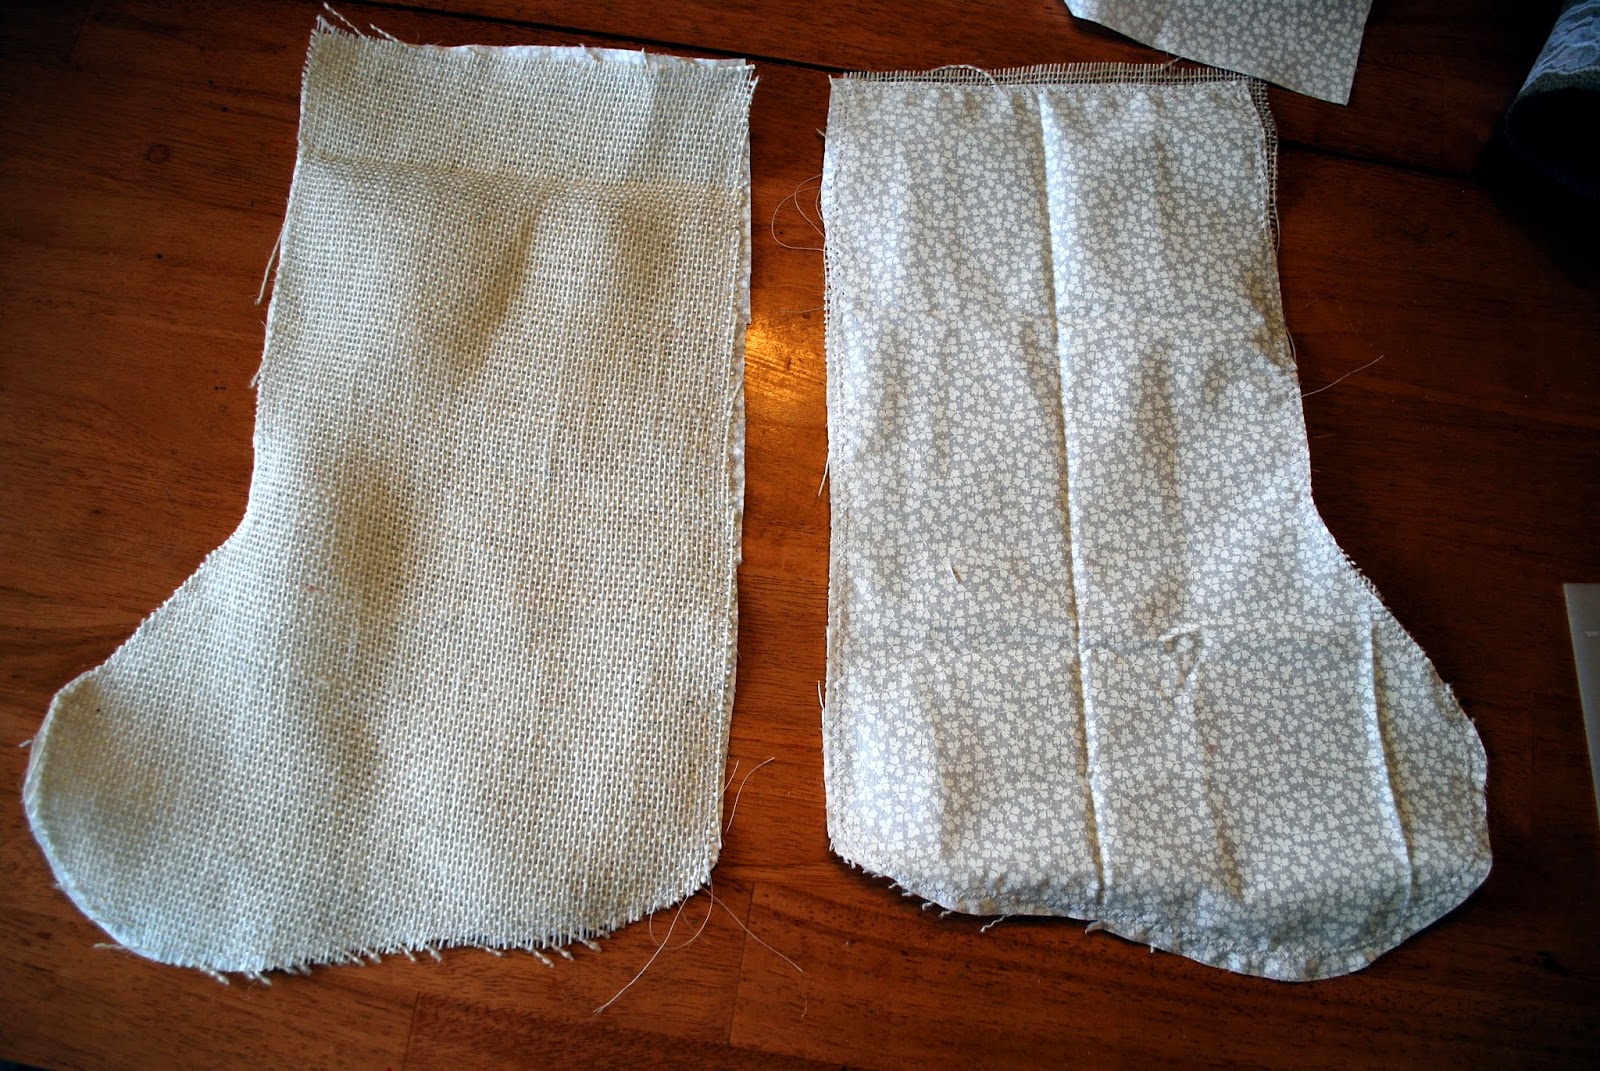
Using scissors I cut out 2 sock shaped pieces.
I had read that burlap was really tricky to work with, so I was really nervous to cut it due to possible fraying, but as soon as it was cut I just laid it out on the table and tried not to fuss with it, and I didn't have any fraying.

I then laid out the stocking pieces on the white fabric and cut it out.
See? Fat quarters work perfectly here!
See? Fat quarters work perfectly here!
Leave about 2" of the fabric above where the top part of the stocking is.
(You will fold it over the top later).

Using a zig-zag stitch, I then sewed together the fabric and burlap pieces.

It's ok if the fabric and burlap don't line up exactly at the edges, this is just to line the inside of the stocking.

Here are the two pieces with the burlap and fabric sewn together.
Notice anything??
I attached the fabric to the wrong side....
Here I am ripping stitches.
I think this took like 20 min :(

THIS is how the stockings should look after you have sewed the fabric, facing away from each other.

Remember how I said to leave some extra fabric at the top of the stocking?
Well now you can fold it over,
Well now you can fold it over,

and sew across.
Do that with both sides so the front and back look nice and finished.
I just used a zig-zag stitch.

Pin the stocking with the burlap pieces together and sew around the edges, but not across the top.

Turn the stocking right side out.

I loved this lace and burlap ribbon Burlapfabric.com sent me and I knew it would add the perfect touch of femininity.
I cut a piece the width of my stocking and the edges already had a pretty design sewn around it, so I actually just used a hot glue gun and glued it into where the seam on the sides is. I also glued along the top and bottom edges.


I wanted to show you what the inside of the stocking looked like.

Burlapfabric.com also sent a roll of burlap ribbon, so I cut a strip to use as the piece to hang my stocking with.

Fold the strip in half,
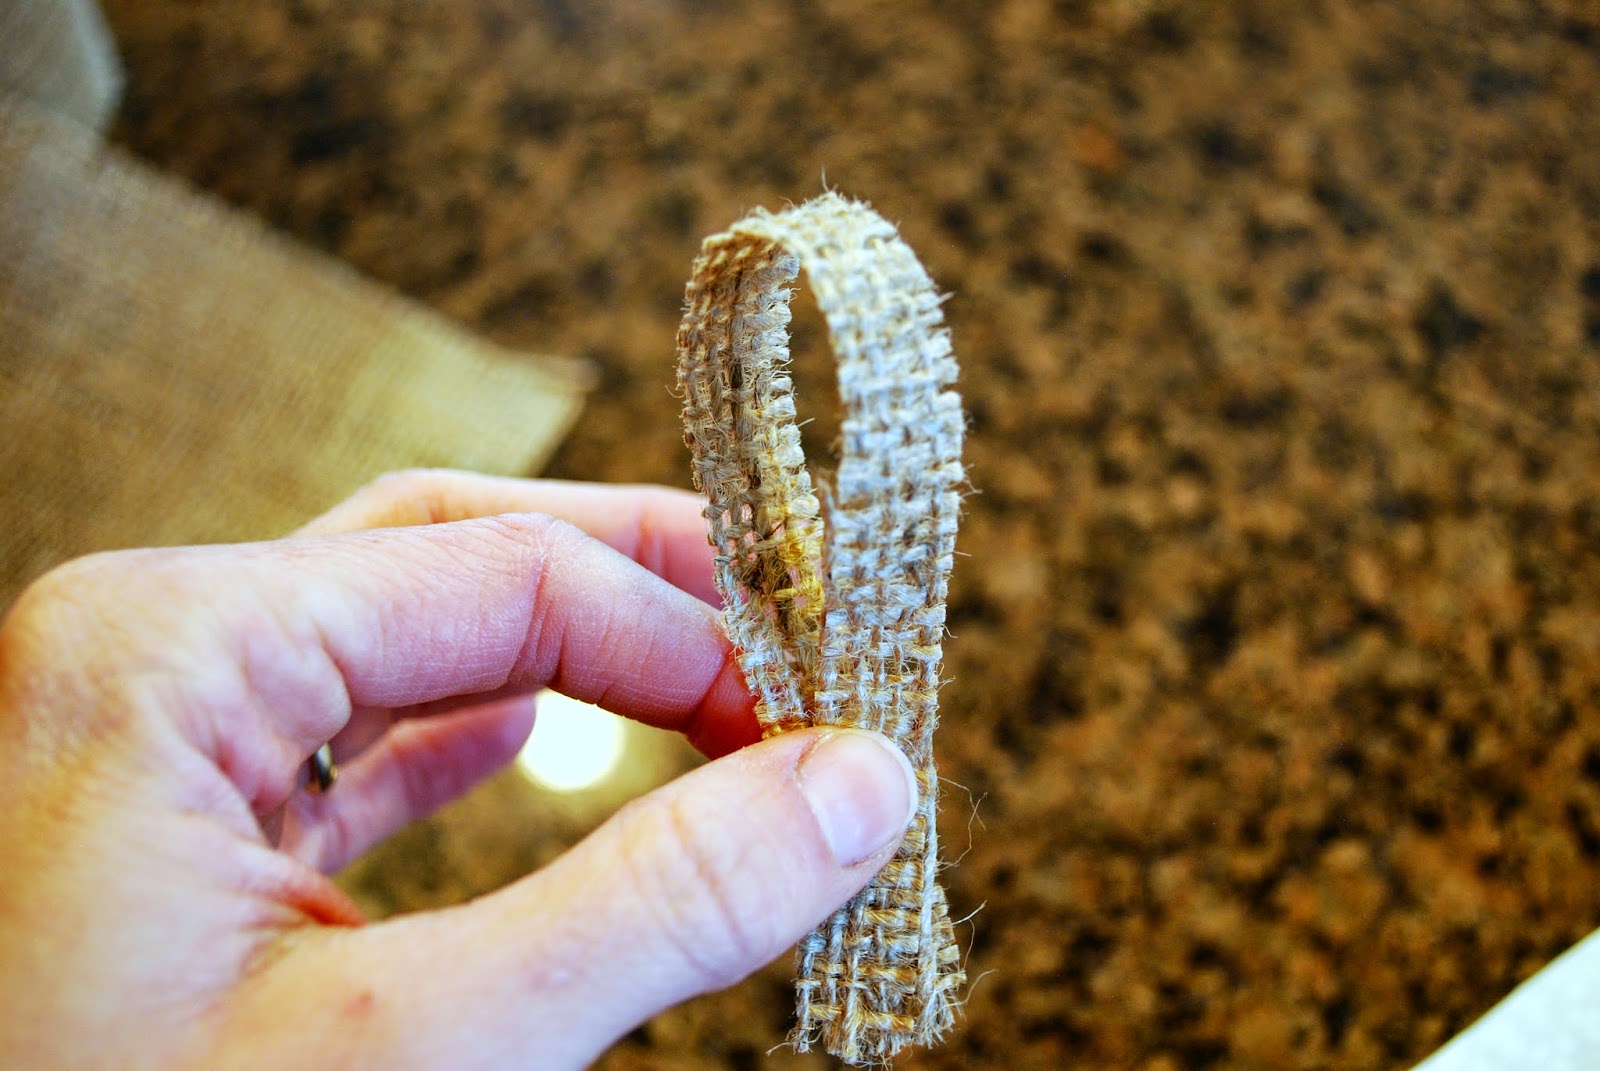
and glue it just inside the corner you want it to hang from.

Since that piece was going to just have the raw edges, I wanted to make sure it wouldn't fray, so I grabbed some Mod Podge,

and painted it all along the edge of the strip.
Let it dry.
It will be a little stiff, but that's ok because it's just for hanging.

All along I had been planning on putting a little flower on the stocking, but I had no idea what I wanted it to look like.
I had some brown fabric scraps, and some white fabric left over from the lining of the stocking and I came up with this.

I was so excited with how it turned out, this was my first attempt at a fabric flower!
I have posted the tutorial for the fabric flower, you can find it here Fabric Flower Tutorial
There you have it!

I'm so excited to start on the other stockings!
My oldest son has some ideas he wants to use so we are going to work on his together, stay tuned, I will post those as well!
Thanks again Burlapfabric.com, I loved your products!
Make sure to check them out on Facebook as well for some cute ideas!
Adorable! I love this idea. Thanks for sharing! :)
ReplyDeleteThank you! And thanks for stopping by!
DeleteYour stocking turned out great! Thanks for linking up at the #HomeMatters linky party.
ReplyDelete~Bonnie
Beautiful and creative.
ReplyDeleteI love how this came out!!! I haven't worked with burlap either and I can't wait to try it!! I'm stopping by from Sew Crafty Angel's Wake Up Wednesday Linky Party and a co-host.
ReplyDeleteHere is what I will be sharing this week: http://craftybrooklynarmywife.blogspot.de/2014/12/my-favorite-posts-from-2014.html
Stop by my blog when you have a moment. I am following you now too.
Happy New Year!!
Congratulations on being featured on Wake Up Wednesdays linky party! Check it out here- http://tanyaanurag.blogspot.com/2014/12/wake-up-wednesday-linky-49.html and don't forget to grab the 'Featured Badge'.
ReplyDeleteHappy New Year!
-Tanya
Thank you, that's so kind!
DeleteHi, Michelle, I'm Louise Douglas, one of the cohosts for Decembers wakeup Wednesday's linky. I just want to congratulate you for being featured on this week's linky! I'm your newest follower on your blog, and your social media platforms! Happy New Year!
ReplyDeleteShare great information about your blog , That’s what I was looking for. I am talking about all topics bundled in this blog. Blog really helpful for me. Thanks for share your blog here.
ReplyDelete